
When you embark on a polar cruise, you’ll find yourself taking a lot of photos! Of course, with unique flora and fauna so close, and jaw-dropping scenery, you’ll want to capture as much as you can to share with friends and family, and to remember your once-in-a-lifetime adventure long after you’ve returned home.
To make sure you come away with great photos that truly reflect the beauty that is all around you, there are some general guidelines on how to take a remarkable picture, as well as tips specific to the conditions you’ll experience in the Arctic or Antarctica.
YOUR GEAR
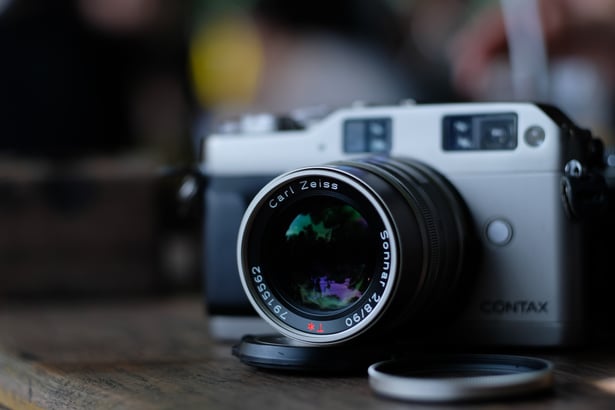
Source: Pexels
While you’ll be able to take some beautiful photos with your phone due to the staggering landscapes of the Arctic or Antarctica alone, investing in a DSLR camera if you don’t already have one will make a huge difference in the quality of pictures you’re able to take.
From there, you might want to consider taking more than one lens. Taking a zoom lens means that you can capture wildlife without getting too close where you might disturb them. A wide-angle lens is also ideal for conveying the vastness of the landscape.
You might want to leave your tripod at home. The ship is in perpetual motion, so unless you are trying to get video, there aren’t many opportunities for long-exposure shots. Carrying a tripod on and off the zodiac and through various terrains is cumbersome, and you’ll likely find yourself wishing you’d left the extra gear at home.
Err on the side of bringing too many memory cards rather than not enough. A few smaller-sized cards is better than risking everything on one large one.
Protect your camera by using sturdy covers and keeping it in a waterproof bag. Not only can the weather change suddenly, but you will be traveling on a zodiac to get to different sites where it could be splashed. Have lens cloths handy, and a hood for your lens to protect it from the elements.
When the temperature is below freezing, you can “acclimatize” your camera by setting it outside before you’re ready to head out. This reduces the amount of fog on your gear by the time you want to shoot.
For batteries, make sure you have a backup with you, and a backup for your backup. Consider having one battery in your camera, one on your person, and another charging back on the boat. Carry batteries in your pocket or close to your skin to keep them warm. Charges do not last long in cold temperatures.
And don’t forget about yourself! By dressing so that you stay warm, you make sure that you’ll be comfortable enough to focus on getting great shots. Along with thermals, hats, and a jacket, you should bring along some fingerless gloves that will keep your hands covered when not shooting, and that you can pull back easily when you’re ready to snap a picture. Otherwise, your fingers will too be cold to press the buttons on your camera.
SETTINGS
The more familiar you are with your camera, the less you’ll have to worry about having to figure things out once you’re on your adventure. Get to know your camera before you depart, and if there’s something you’re not completely comfortable with, use some of your downtime on the ship to learn how to better shoot with ease.
Because things change so often in the polar regions, there are no ideal settings that will work all the time. If you understand what your camera settings mean, you’ll be more flexible and able to adapt when you’re in the midst of a spectacular moment.
Two settings to pay special attention to are the aperture and shutter speed. Because you are moving fast, or the animals you’re trying to capture are, adjusting your shutter speed will help you freeze motion. Aperture allows you to control the focus—a low aperture accentuates the foreground, while a high aperture clarifies the background.
You will want to keep your flash off while shooting in a polar region. Also, if your camera emits any sounds when pressing buttons, turn them off so that they don’t startle the wildlife.
POLAR CHALLENGES
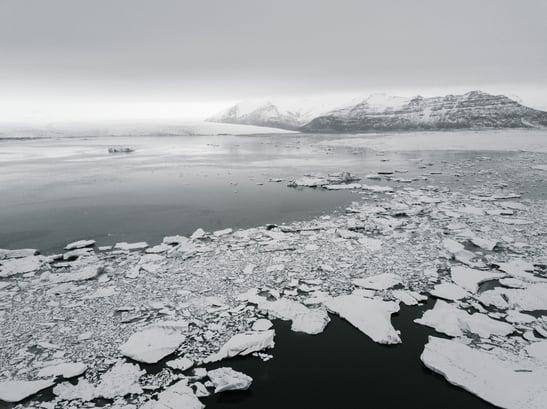
Source: Pexels
Besides the weather, both Antarctica and the Arctic present other challenges to the photographer. First, let’s state the obvious: there is a lot of white space in the Arctic and Antarctica. Not only from snow and ice, but also the brightness of light from the clear sky, and many reflective surfaces. This puts your photos at risk of being underexposed.
To counter underexposure, you can adjust your settings with the “+” button on your camera. Change the exposure value to +⅓ or + 1 ⅓, which will slow the shutter speed and balance out your photos so that they don’t look overly gray.
The “white balance” setting can also be a way to counteract overexposure when you are trying to capture the intensity of a color, such as the rich blue seen in glaciers.
If you’re not quite sure what settings to use while in the polar regions, the best thing to do is experiment. You can also try the “scene” mode on your camera which has default settings for things like “snow” and “landscape.” Try taking some pictures from the ship and playing around with what works best for you.
Two words to keep in mind if you’re taking photos in the Arctic or Antarctica: Be ready! Wildlife might appear at any moment, and the landscape itself is constantly changing. Try putting your camera on burst mode so you can capture many frames at once and then focus on the area where you think the action will be.
COMPOSITION TIPS
If photography is not something you’ve done often before your trip, a few solid tips on composition will help you take some extraordinary pictures while on an expedition.
First of all, think about including items in your shot to give views a sense of scale. Much of the Arctic and Antarctica is unfathomably large, so including an animal, a fellow traveler, or a boat in a picture will give people looking at your pictures an idea of how big that iceberg really was. This can also help break up a picture that is mostly snow or ice by giving a detail that contrasts with the all-gray or all-white.
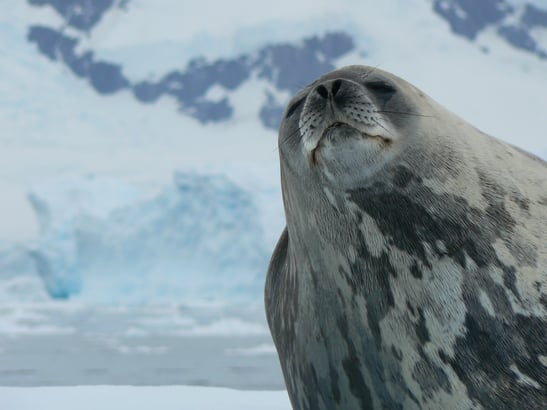
Source: Pexels
If a penguin or other animal is the subject of your photo, leave plenty of space around it so it really stands out. You can also experiment with not placing your subject in the exact center of your frame. Try thinking of your picture as divided into thirds, and placing the subject on one of these lines instead of directly in the middle.
While it’s tempting to zoom out and try to include as much of the landscape as possible, don’t forget to zoom in as well. You can create some really interesting photos by getting up close to the ice, capturing the textures of the landscape, showing the intricacy of flora or smaller details that are only visible once you are there are on the ground.
STEP AWAY FROM THE CAMERA!
It might seem like odd advice in the midst of photography tips, but if you obsess too much about seeing things through your lens, you might miss out on what is right in front of you. While it’s understandable to want to capture as much of the polar region as best you can, don’t let that get in the way of actually being there. Take a moment to leave your camera packed away and enjoy everything you’re seeing all around you.
If you’ve got your camera ready and are itching to put together your polar portfolio, take a look at upcoming trips and find the perfect adventure to realize all your shutterbug dreams!


